
Contents
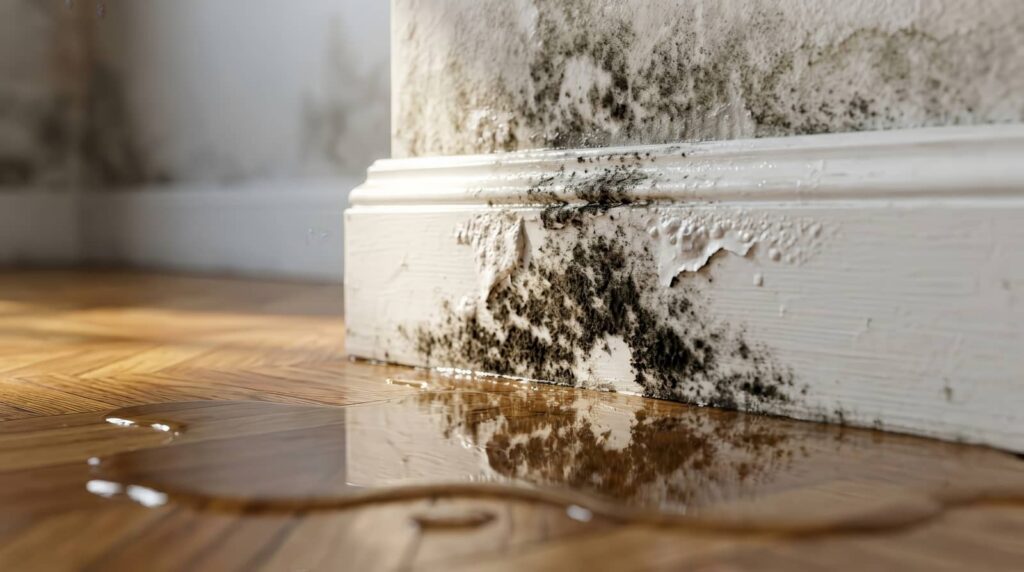
Can you prove that mold starts only after visible water is gone? Mold Remediation after a flood requires shutting off utilities, stopping basement seepage, and documenting every damaged area before hidden growth takes hold. You’ll inspect walls, floors, and cavities, remove saturated materials, and dry the space fast. The real test comes next: whether your remediation method actually prevents spores from returning.
Key Takeaways
- Treat flood-damaged property as unsafe, shut off utilities if possible, and document all damage for insurance.
- Dry affected areas within 24 to 48 hours to prevent mold growth, using fans, dehumidifiers, and ventilation.
- Remove saturated porous materials like drywall, carpet, and insulation if they cannot be fully dried.
- Contain the work area, wear protective gear, and clean hard surfaces with approved antimicrobial solutions.
- If sewage is involved, use biohazard precautions, discard contaminated porous items, and disinfect hard surfaces thoroughly.
What to Do Right After a Flood
As soon as the floodwater recedes, you should treat the property as contaminated and unsafe until you verify otherwise. Enter only if local authorities say it’s clear.
Turn off power, gas, and water if you can do so safely, then document visible damage with photos for flood insurance. Call your emergency contacts, notify your insurer, and report any structural hazards or sewage exposure.
Wear boots, gloves, and eye protection when you inspect. Remove people and pets from affected rooms, and isolate damaged areas to protect your team and neighbors.
Open windows only if outdoor conditions support drying. Start a written log of dates, losses, and conversations.
If you’re uncertain, bring in certified remediation professionals quickly. Acting fast helps you stay organized, safe, and supported.
Stop Basement Water Before Mold Starts
Stop basement water immediately, because standing moisture creates ideal conditions for mold within 24 to 48 hours. You need to control every entry point fast: seal foundation gaps, extend downspouts, and clear exterior grading so water moves away from your home.
Use waterproofing techniques such as sump pumps, vapor barriers, and crack injection to reduce seepage. Inside, run a dehumidifier and keep air moving to limit humidity.
Check drainage solutions like French drains or perimeter channels if runoff keeps returning. If you act now, you protect your space, your belongings, and your crew-like confidence in a dry, healthy basement.
Precise moisture control isn’t optional after flooding; it’s the first barrier that stops mold before it can establish and spread.
Inspect Walls, Floors, and Hidden Damage
You need to inspect wall surfaces for moisture, staining, and soft or warped materials, since these signs show water intrusion.
You should assess floors for cupping, buckling, delamination, and hidden saturation beneath finishes or subflooring.
You also need to detect concealed mold in cavities, behind trim, and under damaged materials before remediation begins.
Wall Moisture Checks
Before remediation begins, you should verify wall moisture with a calibrated meter and inspect adjoining floors, baseboards, and hidden cavities for trapped water or concealed damage.
Use moisture meters at multiple heights and document every reading so your wall inspections reveal wet drywall, saturated insulation, or shifting moisture gradients. You’ll want to compare affected areas with dry reference points, because a small variance can signal hidden intrusion behind paint or trim.
If readings stay elevated, open test points and confirm whether structural materials remain damp. This disciplined process helps your team share a common standard, reduces missed contamination, and supports confident remediation decisions.
Never rely on touch alone; precise measurement keeps your cleanup plan accurate, defensible, and aligned with certified mold-remediation practice.
Floor Damage Assessment
Next, assess floor damage by tracing moisture across flooring, subflooring, and adjacent wall bases to determine how far floodwater traveled.
You’ll compare floor types because hardwood, laminate, carpet, and tile respond differently to saturation, swelling, cupping, delamination, or grout failure.
Use a calibrated moisture meter and record readings at the perimeter and center of each room.
Look for clear damage indicators such as discoloration, soft spots, lifted edges, and buckling at seams.
Check connections, baseboards, and any floor penetrations for spread patterns that match flood paths.
You’re not just documenting loss; you’re building the shared technical picture your remediation team needs to act with confidence.
If readings stay elevated, flag the assembly for controlled removal and drying.
Hidden Mold Detection
Floor readings can reveal more than surface saturation; they often point to concealed mold activity behind drywall, under trim, and within cavities where floodwater lingered.
You should trace moisture patterns upward and outward, then inspect baseboards, wall joints, and flooring connections for staining, swelling, or delamination.
Use a calibrated meter, infrared scan, and targeted mold testing to confirm suspect areas, especially where airflow was restricted.
If you find elevated readings, open small inspection points and verify the substrate condition before restoring finishes.
Keep moisture control active with dehumidification, ventilation, and source repairs so hidden growth can’t rebound.
When you follow this process, you protect your space and join the group of homeowners who restore safely, systematically, and with confidence.
Remove Wet Materials Safely
Tackle saturated materials quickly to limit mold growth and cross-contamination. You’ll protect your crew and home community by removing damaged items with disciplined removal techniques and sealed containment.
Wear gloves, eye protection, and a respirator, then sort materials by salvageability.
- Bag porous debris, carpet, and insulation in heavy plastic.
- Dismantle unsalvageable drywall in manageable sections.
- Label and isolate contaminated loads before transport.
Use clean tools and avoid dragging wet items through unaffected rooms. If framing, subflooring, or insulation stays structurally compromised, remove it promptly.
You’re building a safer recovery zone when you keep pathways clear, minimize contact, and document what leaves the space. Work methodically, and your team will reduce exposure, preserve confidence, and set up the next remediation steps.
Dry the Basement Completely
Drive out moisture fast to stop hidden mold from spreading through framing, joists, and concrete. You should open basement windows only if outside air is drier than indoor air, then maximize air circulation with box fans aimed to move humid air toward exhaust points.
Keep dehumidifier usage continuous until relative humidity stays below 60 percent; empty or drain the unit so it runs without interruption. Check walls, sill plates, and slab edges with a moisture meter, and continue drying until readings stabilize.
Pull stored items off the floor so air can reach every surface. Stay methodical: a dry basement protects your home’s structure and helps your crew move forward together with confidence.
Inspect daily, adjust equipment placement, and document humidity trends to confirm progress.
Use Safe Mold Remediation Methods
You should contain the affected area and maintain controlled ventilation to limit airborne mold spores during remediation.
You’ll need protective gear, including an N95 or higher respirator, gloves, and eye protection, before you handle contaminated materials.
Clean hard surfaces with approved antimicrobial solutions and remove porous items that can’t be safely restored.
Containment And Ventilation
Before remediation begins, seal the affected area with physical containment barriers and establish controlled negative pressure to keep mold spores from migrating into clean spaces.
You’ll strengthen this setup with airtight sealing barriers, then verify airflow management so exhaust moves outward, not back into the structure. Keep openings minimal and direct captured air through HEPA filtration before discharge. This approach protects the rest of the property and supports a disciplined, team-based remediation process.
- Inspect barrier seams for leaks.
- Maintain negative pressure during work.
- Confirm filtered exhaust stays isolated.
When you follow these controls, you reduce cross-contamination and create a cleaner path for certified removal.
Stay consistent, document conditions, and you’ll work with confidence as part of a safe, coordinated recovery.
Protective Gear Essentials
A complete protective ensemble is essential during certified mold remediation after flood damage, especially when disturbed surfaces can aerosolize spores and contaminated dust.
You should wear sealed protective gear: a fit-tested respirator, chemical-resistant gloves, eye protection, and disposable coveralls with boot covers.
Choose essential supplies that create a barrier between you and the work zone, and verify each item is intact before entry.
You’ll fit in with a disciplined crew when you inspect seams, replace damaged PPE, and keep spare filters nearby.
Avoid skin exposure and track contamination outside the area by removing gear in the correct sequence.
Your protection isn’t optional; it’s the standard that keeps you safe, compliant, and ready to work with confidence.
Safe Cleaning Methods
Once your protective gear is in place, use cleaning methods that contain contamination instead of spreading it. You should isolate the work area, keep doors closed, and run HEPA filtration to protect your team.
Mist surfaces lightly with clean water so spores don’t become airborne, then scrub with detergent and disposable cloths. Remove porous materials that stay wet, because they can’t be fully sanitized. Choose eco-friendly solutions and chemical-free options only when they achieve verified removal, not just fragrance masking.
- Bag debris immediately in sealed, labeled plastic.
- Wipe from the cleanest area toward the most contaminated.
- Dry all surfaces within 24 to 48 hours.
These safe mold remediation methods help you work efficiently, reduce exposure, and keep everyone involved aligned and confident.
Clean Sewage-Contaminated Areas
When sewage has contaminated flood-damaged areas, you need to treat the space as a biohazard and remove all affected materials promptly.
You should isolate the work zone, wear gloves, boots, eye protection, and a respirator, and keep others out to protect everyone’s sewage safety.
Bag porous items, drywall, insulation, and carpet immediately; discard them according to local hazardous-waste rules.
Clean hard surfaces with detergent and water, then disinfect with an EPA-registered product labeled for sewage cleanup.
Scrub cracks, corners, and hidden seams where contamination risks concentrate. Rinse, then wipe dry with clean disposable towels.
Wash tools and reusable PPE separately after each task.
If the area still smells foul or shows staining, repeat cleaning until you’ve restored a safe, sanitary environment for your team.
Prevent Mold From Coming Back
To prevent mold from returning, you need to eliminate excess moisture fast and keep humidity below 60%. You can protect your home with consistent preventive measures that target leaks, condensation, and poor airflow.
Join the group of owners who stay ahead of damage by acting early and documenting every problem.
- Inspect plumbing, roofs, and foundations after storms.
- Run dehumidifiers and exhaust fans in damp spaces.
- Schedule regular inspections to catch hidden growth.
You should also dry carpets, walls, and framing completely within 24 to 48 hours, then replace porous materials that stayed wet too long.
Seal cracks, clean gutters, and maintain HVAC filters so spores can’t spread. When you stay disciplined, you reduce risk and keep your space safe.
Final Thoughts
When you act fast after a flood, you cut mold off at the knees and keep your basement from becoming a breeding ground. By stopping water, removing soaked materials, drying thoroughly, and cleaning contaminated areas with certified remediation methods, you restore control before hidden damage spreads like smoke through a wall. Stay vigilant, keep humidity low, and inspect regularly. Your disciplined response doesn’t just clean up damage—it shields your home’s structure and your health.
Recent Posts
Emergency Flood Cleanup for Water Damage Response
If you lose power just as water starts rising, you have a flood response problem
7 Emergency Flood Cleanup Tips
You might not realize that floodwater can hide electrical hazards and structural damage even after
Why Mold Remediation Follows Flood Cleanup
Could it be true that flood cleanup alone leaves a hidden mold problem behind? You