
Contents
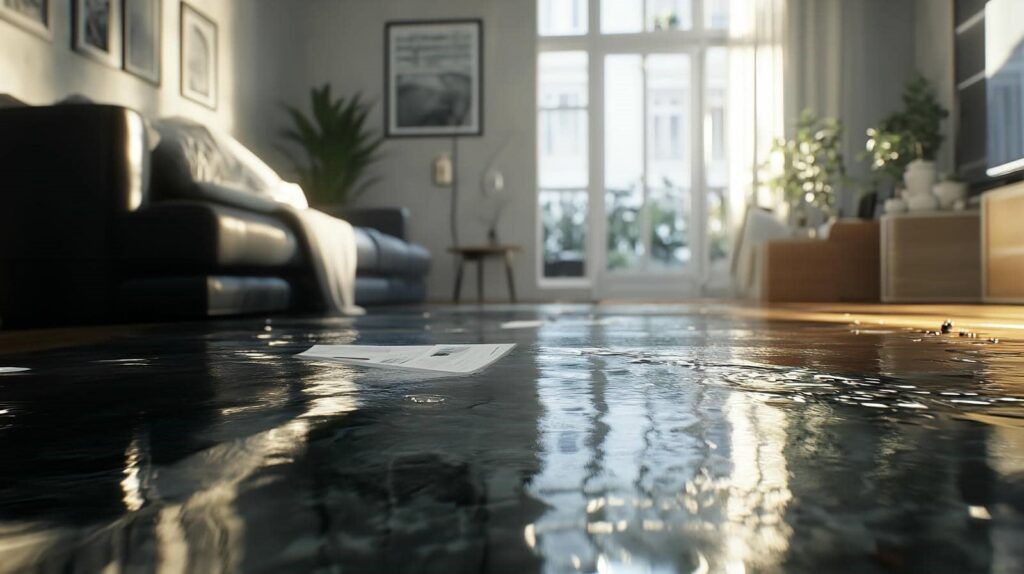
Water damage is like a ticking clock, threatening to release mold if not addressed swiftly. You need to act quickly to mitigate risks and protect your space. Start by stopping the water source and drying affected areas. But there’s more to it than just drying. What steps should you take next to guarantee a thorough mold removal? Understanding the process is essential for long-term health and safety.
Key Takeaways
- Act quickly to remove standing water and dry affected materials within 24 to 48 hours to prevent mold growth.
- Wear proper safety gear, including gloves, an N95 respirator, and goggles, to protect yourself during mold removal.
- Use a water and detergent mixture for cleaning surfaces, discarding porous materials that can’t be salvaged.
- Conduct air quality testing post-removal to identify lingering mold spores and ensure a safe indoor environment.
- Maintain low indoor humidity levels and ensure proper ventilation to prevent future mold growth.
Immediate Steps to Take After Water Damage
When you discover water damage, the first thing you need to do is act quickly to prevent mold growth.
Start by identifying the source of the flood damage and stop it if possible. Next, remove any standing water using a wet/dry vacuum.
Once that’s done, focus on moisture control: open windows, turn on fans, and use dehumidifiers to speed up drying.
Make sure to dry all affected materials, including carpets and furniture, within 24 to 48 hours to minimize the risk of mold.
Inspect hidden areas, like behind walls, where moisture can linger.
Taking these immediate steps not only protects your space but also fosters a sense of community as you work to restore your environment together.
Check for Mold Presence
How can you effectively check for mold presence after water damage? Start by identifying mold growth indicators, such as a musty odor, discoloration on surfaces, or peeling paint.
Inspect areas prone to moisture, like basements or around plumbing fixtures. Use moisture meters to evaluate dampness in walls and materials; high readings often signify potential mold.
For more precise results, consider employing testing methods like air sampling or surface swabs. These approaches can help identify specific mold species and their concentrations.
Safety Gear and Precautions for Safe Mold Removal
Before you start mold removal, it’s essential to equip yourself with the right safety gear to protect against harmful spores.
Guarantee proper ventilation in the area to minimize inhalation risks, and always follow correct disposal techniques for contaminated materials.
These precautions will help keep you safe throughout the mold remediation process.
Protective Equipment Essentials
Proper protective equipment is essential for safe mold removal, especially after water damage.
Begin with high-quality gloves to protect your hands from mold spores and cleaning agents. A respirator with an N95 rating or higher is vital to filter airborne particles, ensuring you breathe safely.
Don’t forget eye protection—goggles will shield your eyes from irritants. Wear long-sleeved clothing and boots to minimize skin exposure; ideally, choose disposable gear to prevent cross-contamination.
Follow established safety protocols, including sealing off affected areas to contain spores. Always wash your protective gear thoroughly after use.
Ventilation Safety Measures
Ensuring adequate ventilation is essential to safely managing mold removal after water damage. Start by promoting natural airflow; open windows to enhance air circulation and reduce humidity.
Utilize exhaust fans in affected areas to expel contaminated air and bring in fresh oxygen. To maintain ideal humidity control, consider using dehumidifiers, especially in enclosed spaces where moisture tends to linger.
Assess your ventilation systems to confirm they’re functioning correctly, as they play a significant role in controlling mold spores.
By prioritizing these ventilation safety measures, you not only protect yourself but also create a healthier environment for everyone involved in the mold removal process.
Proper Disposal Techniques
When tackling mold removal, wearing appropriate safety gear is essential to protect yourself from harmful spores and contaminants. Use N95 respirators, gloves, and goggles to minimize exposure.
Once you’ve removed the moldy materials, follow proper disposal techniques. If items are heavily infested, consider them hazardous waste and check local regulations for disposal guidelines.
For less contaminated organic materials, you might follow composting guidelines, ensuring they meet safety standards. Seal all waste in airtight bags to prevent spore release during disposal.
Always prioritize your health and safety; the right precautions not only protect you but also create a safer environment for everyone involved.
Top Mold Removal Techniques You Should Know
To effectively combat mold after water damage, it’s essential to employ the right removal techniques. Start by identifying affected areas and evaluating mold growth thoroughly.
Use a mixture of water and detergent for surface cleaning, ensuring you scrub thoroughly to enhance removal effectiveness. For porous materials like drywall and carpets, consider discarding items that can’t be adequately cleaned.
After initial cleaning, apply a mold-killing solution, such as diluted bleach or vinegar, to prevent future growth. Always ventilate the area to reduce moisture, as this is vital for long-term success.
Finally, monitor the space for any signs of recurring mold. Following these steps diligently will help you reclaim your environment and foster a healthier living space.
Essential Equipment for Mold Removal
Having the right equipment is vital for effective mold removal after water damage. Start with essential tools like high-efficiency particulate air (HEPA) vacuums, which capture mold spores efficiently.
You’ll also need mold removal products that contain fungicides or biocides to eliminate mold growth effectively. Protective gear, including gloves, goggles, and respirators, is important to safeguard your health during the process.
For porous materials, like drywall, consider using a mold-resistant spray to prevent future infestations. Don’t forget a dehumidifier to help control moisture levels in the affected area.
Finally, make sure you have sturdy trash bags for safely disposing of contaminated materials. With these tools and products, you’re equipped to tackle mold removal confidently and effectively.
DIY vs. Professional Mold Removal: When to Call for Help
When evaluating mold severity, it’s essential to identify the extent of the growth and the potential health risks involved.
While DIY methods can be effective for minor infestations, understanding your limitations is key to preventing further damage.
If the mold covers a large area or poses significant health concerns, calling a professional may be the best option.
Assessing Mold Severity
How can you determine whether to tackle mold removal yourself or call in professionals? Start by evaluating mold growth indicators, such as discoloration, musty odors, and visible patches.
If the affected area exceeds 10 square feet or involves HVAC systems, consider professional help. Mold species identification is essential; some species, like black mold, can pose serious health risks.
If you’re unsure about the type of mold or how to handle it safely, it’s wise to consult experts. Additionally, if you experience health issues like respiratory problems, don’t hesitate to seek professional assistance.
Understanding DIY Limitations
Determining whether to handle mold removal yourself or call in professionals hinges on understanding your limitations.
While DIY can be effective for minor mold growth, larger infestations pose significant DIY risks. If you notice extensive mold covering over ten square feet, it’s wise to seek professional help.
Professionals have advanced tools and expertise to assess hidden mold, ensuring thorough removal. Additionally, if you or anyone in your household has health issues, the risks of exposure increase, making professional intervention essential.
Remember, tackling mold without proper precautions can lead to further contamination and health hazards.
Assess your situation carefully—sometimes, the best choice for your home and health is to let the experts handle it.
Preventing Future Mold Growth
To effectively prevent future mold growth, it’s crucial to address moisture issues promptly and maintain a dry environment.
Start by using mold-resistant materials, especially in areas prone to dampness, like bathrooms and kitchens. These materials can greatly reduce mold’s ability to thrive.
Regularly check for leaks and repair any water damage immediately to eliminate moisture sources.
Implement humidity control measures, such as using dehumidifiers or exhaust fans, to keep indoor humidity levels below 60%.
Guarantee proper ventilation throughout your home, particularly in basements and attics.
Finally, perform routine inspections to catch potential mold growth early.
Why Air Quality Testing Matters After Mold Removal
Even after taking steps to prevent future mold growth, monitoring the air quality in your home post-removal is vital. Effective air quality testing methods help identify lingering mold spores that could pose health risks.
By conducting thorough testing, you can guarantee your indoor environment is safe and free from contaminants. This verification process is significant, as mold can lead to long-term effects on respiratory health and overall well-being.
Regular checks empower you to address any issues promptly, fostering a healthier living space for you and your loved ones. Prioritizing air quality not only protects your health but also strengthens your home’s resilience against future mold problems, creating a more inviting and secure atmosphere.
Documenting Damage for Insurance Claims
How can you guarantee that your insurance claim for water damage is processed smoothly? Start by ensuring detailed damage documentation.
Take clear, detailed photos of affected areas, including walls, flooring, and personal items. Note the date, time, and extent of the damage for accurate records.
Create an inventory of damaged items, including their value, to support your claim.
Contact your insurance provider promptly to understand specific insurance processes, as policies may vary.
Keep copies of all correspondence and receipts related to repairs and mitigation efforts.
This thorough documentation not only substantiates your claim but also expedites the review process.
Frequently Asked Questions
How Long Does Mold Take to Grow After Water Damage?
Mold can start growing within 24 to 48 hours after water damage, depending on moisture control. To minimize the mold growth timeline, guarantee you dry affected areas promptly and maintain low humidity levels.
Can Mold Return After Removal?
“An ounce of prevention’s worth a pound of cure.” Yes, mold can return after removal. Implement effective mold prevention strategies and maintain your space with post removal maintenance to keep it mold-free and welcoming.
What Types of Mold Are Most Common After Water Damage?
After water damage, you’ll most commonly encounter black mold and toxic mold. Elevated indoor humidity and persistent mold spores thrive in damp areas, making mold prevention essential, especially near water leaks. Stay vigilant to protect your home.
Is It Safe to Stay in the Home During Mold Removal?
It’s generally not safe to stay during mold removal due to health risks. Use prevention methods, like sealing off affected areas, to minimize exposure. Prioritize your well-being and consider finding temporary accommodations during the process.
How Can I Tell if My Mold Removal Was Successful?
Over 30% of homes face mold issues. To confirm successful remediation, use mold inspection techniques like air quality tests and visual checks for discoloration or odors. Absence of these signs indicates effective mold removal.
Summary
Addressing mold growth promptly is crucial. Did you know that mold can start growing within 24 to 48 hours after water exposure? By taking immediate action and following proper removal techniques, you can greatly reduce health risks and property damage. Remember to document everything for insurance claims and consider air quality testing post-removal. Staying vigilant now will help prevent future mold issues, ensuring a healthier environment for you and your loved ones.
Recent Posts
Top 3 Flood Damage Restoration Techniques for Homes
Did you know that mold can start growing within 24 to 48 hours after a
3 Best Flood Damage Restoration Techniques for Homes
Did you know that nearly 14,000 people experience a water damage emergency each day in
Top Flood Damage Restoration Techniques for Homes
It’s interesting how often homeowners find themselves unprepared for flooding, just when they think it