Contents
Did you know that fast water extraction can greatly reduce the risk of mold growth in your home? When faced with an emergency, it’s essential to assess the situation and identify the source of water quickly. Understanding the right tools and techniques can make a considerable difference. In the following sections, we’ll explore effective methods to tackle water extraction, ensuring your home remains safe and resilient against future incidents.
Key Takeaways
- Swift emergency water extraction minimizes damage and prevents mold growth, highlighting the importance of quick action.
- Essential tools include wet/dry vacuums, submersible pumps, moisture meters, and dehumidifiers for effective moisture management.
- DIY methods like using towels and mops can quickly absorb moisture, but always assess for electrical hazards first.
- Professional assistance is crucial for significant water damage to detect hidden moisture and ensure thorough remediation.
- Implement ventilation techniques, such as fans and dehumidifiers, to promote drying and prevent long-term water damage.
Understanding the Importance of Emergency Water Extraction
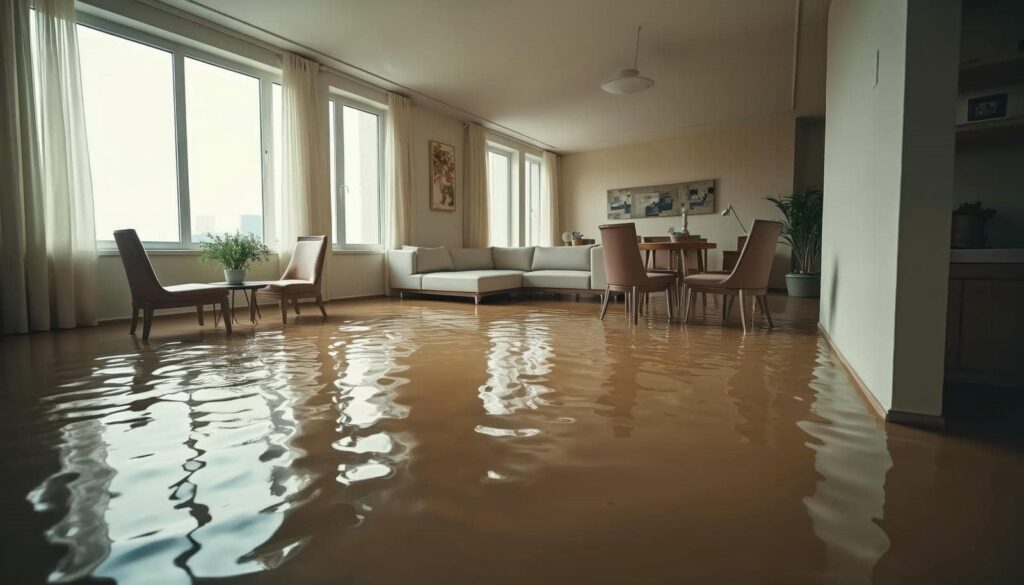
When water unexpectedly floods your property, understanding the importance of emergency water extraction becomes essential. Acting swiftly minimizes water damage and prevents long-term structural issues.
The quicker you extract water, the less likely mold and mildew will develop, safeguarding both your home and your health. Emergency preparedness involves having the right tools and a plan in place, ensuring you can respond effectively when disaster strikes.
Familiarize yourself with extraction methods like pumps and vacuums, and consider enlisting professional services if the situation escalates. Remember, every minute counts during a flood.
Prioritizing immediate action not only protects your property but also fosters a sense of community resilience, allowing you to support others facing similar challenges.
Assessing the Situation: Identifying the Source of Water
Before you can effectively extract water, it’s essential to identify its source. Start with a thorough moisture assessment to pinpoint potential water sources.
Check for flood origins, such as heavy rainfall or nearby bodies of water. Inspect your home for plumbing issues; leaks in pipes can cause significant damage.
Look for roof leaks, especially after storms, as they often go unnoticed. Don’t overlook appliance failures—dishwashers and washing machines can be culprits as well.
Additionally, evaluate drainage problems around your property, ensuring water flows away from your foundation. Use leak detection methods to find hidden moisture.
Essential Tools for Effective Water Extraction
Once you’ve pinpointed the source of water, gathering the right tools becomes vital for effective extraction. Start with a high-capacity wet/dry vacuum; it’s essential for removing standing water quickly.
For larger areas, consider using submersible pumps, which efficiently handle vast quantities of water. Don’t forget extraction equipment like moisture meters and dehumidifiers to assess and control humidity levels post-extraction.
Additionally, have fans on hand to promote airflow, aiding in the drying process. These water removal techniques not only help mitigate damage but also guarantee a healthier environment.
DIY Methods: Using Household Items for Quick Extraction
When faced with water emergencies, you can use common household items for effective extraction.
Employ towels and mops to absorb excess moisture quickly, ensuring you wring them out frequently for maximum efficiency.
Additionally, a vacuum cleaner can serve as a powerful tool to remove remaining water, particularly in carpets and upholstery, so make sure to use it correctly to achieve the best results.
Towels and Mops Technique
Utilize towels and mops for effective emergency water extraction to quickly mitigate damage.
Start by grabbing absorbent towels; their compact size makes them ideal for targeted areas. Begin towel soaking by pressing them into the water and then wring them out thoroughly. This method allows you to absorb as much moisture as possible.
After your towels are saturated, replace them with dry ones and repeat the process. For larger areas, use mops to cover more ground efficiently. Mop wringing is essential ensure you’re removing excess water before each pass.
Vacuum Cleaner Utilization
A vacuum cleaner can be a powerful ally in emergency water extraction, especially when you need quick results. Different vacuum types, such as wet/dry vacuums, are designed specifically for this task and offer impressive suction power to remove standing water effectively.
First, verify your vacuum is rated for wet use; otherwise, you risk damaging it. Next, remove any debris from the area to enhance suction efficiency. Position the vacuum nozzle close to the water’s surface, and turn it on to begin extraction. Move slowly, allowing the suction power to do its job.
After extracting as much water as possible, check for lingering moisture and repeat if necessary. This method not only saves time but also fosters a sense of community resilience in facing emergencies.
When to Seek Professional Help for Water Removal
How can you tell if professional help is necessary for water removal? If you’re facing significant water damage, it’s essential to assess the situation carefully.
Consider calling professionals if the water level exceeds a few inches, as DIY methods mightn’t suffice. Additionally, if the water is contaminated like from sewer backup you should seek experts immediately to guarantee safety.
Don’t overlook hidden moisture; if you suspect water in walls or under floors, professionals can use specialized equipment to detect and mitigate it effectively.
If you plan to file insurance claims, having professionals document the damage can streamline the process.
Ultimately, trusting experts can save you time, reduce risks, and help restore your home efficiently.
How to Use Sumps and Pumps for Easy Water Removal
When dealing with water removal, understanding the types of sump pumps available is essential for effective extraction.
You’ll want to familiarize yourself with the installation process to guarantee peak performance and reliability.
Regular maintenance tips can further enhance efficiency, preventing potential issues down the line.
Types of Sump Pumps
Sump pumps play an essential role in managing excess water in basements and crawl spaces, making them important tools for homeowners dealing with flooding or water accumulation.
There are two primary types: submersible pumps and pedestal pumps. Submersible pumps are installed below water level, efficiently removing water while preventing debris clogging.
Pedestal pumps, mounted above the sump pit, are easier to access for maintenance but can be less efficient in deep water.
For added peace of mind, consider a battery backup system, ensuring operation during power outages.
When selecting a pump, pay attention to pump capacity to match your water removal needs.
Proper sump pump installation is critical for effective performance and longevity.
Installation Process Overview
To effectively manage water removal, understanding the installation process of sump pumps is essential.
Start by selecting a suitable location in your basement, ensuring system compatibility with your home’s drainage. Next, dig a pit where the sump basin will sit, ensuring it’s below the water table.
Use proper installation techniques to connect the pump to a discharge pipe that leads outside. Secure all fittings to prevent leaks.
After positioning the pump in the basin, fill the surrounding area with gravel for stability.
Finally, connect the pump to a power source, ensuring it’s on a dedicated circuit to avoid overload. Test the system to confirm that it activates correctly, providing peace of mind during emergencies.
Maintenance Tips For Efficiency
Proper maintenance of your sump pump greatly enhances its efficiency in water removal.
Start with routine inspections to verify your pump is functioning correctly. Look for any debris in the pit or clogs in the discharge line, as these can lead to water damage.
Implement preventive maintenance by testing the pump’s operation monthly; simply pour water into the pit to see if it activates.
Additionally, perform seasonal checks, especially before heavy rainfall or snowmelt, to confirm the system’s readiness.
Don’t forget to check the power supply and battery backup if applicable.
Preventing Mold Growth After Water Extraction
Although you’ve successfully extracted water from affected areas, preventing mold growth requires immediate and strategic action.
Implementing effective mold prevention strategies and humidity control measures is essential to safeguard your home. Here are four critical steps you should take:
Dry Out Surfaces: Use fans and dehumidifiers to thoroughly dry affected areas within 24-48 hours.
Monitor Humidity Levels: Keep indoor humidity below 60% using hygrometers and adjust ventilation accordingly.
Seal Vulnerable Areas: Inspect and seal cracks or gaps in walls and foundations to prevent moisture entry.
Regularly Clean and Maintain: Regularly check for leaks, clean gutters, and guarantee proper drainage to minimize water accumulation.
Safety Tips During Water Extraction
Before starting water extraction, assess electrical hazards to prevent shock or injury.
Always wear protective gear, like gloves and boots, to safeguard against contaminants.
Properly ventilate affected areas to guarantee airflow and reduce the risk of mold growth during the extraction process.
Assess Electrical Hazards First
When tackling water extraction, it’s crucial to assess electrical hazards first to guarantee your safety. Ignoring this step can lead to serious injuries or even fatalities.
Start your hazard assessment by following these steps:
Shut Off Power: Locate the main electrical panel and turn off the power to affected areas.
Identify Wet Wiring: Check for any wiring that’s submerged or wet; avoid touching it.
Use a Voltage Tester: Confirm that outlets and switches are safe to touch with a voltage tester.
Consult Professionals: If unsure, contact a licensed electrician to evaluate the situation.
Prioritizing electrical safety guarantees you can proceed with water extraction without unnecessary risks.
Stay vigilant; your safety matters.
Wear Protective Gear Always
After ensuring electrical safety, the next step in water extraction involves wearing protective gear.
Start by donning protective gloves to shield your hands from contaminants and sharp objects. Safety goggles are essential for keeping your eyes safe from debris and harmful substances in the water.
Equip yourself with waterproof boots to prevent slipping and to protect your feet from potential hazards lurking beneath the surface.
Finally, use respirator masks to guard against inhaling mold spores and other airborne irritants.
By prioritizing your safety with these essential items, you create a secure environment for yourself and anyone assisting with the extraction process.
Ventilate Affected Areas Properly
To effectively mitigate the risks associated with water damage, it’s vital to ventilate affected areas properly.
Proper air circulation not only helps in drying out moisture but also reduces the chance of mold growth.
Employ these ventilation techniques to optimize your efforts:
Open Windows and Doors: Create a cross-breeze to facilitate airflow.
Use Fans: Position high-velocity fans to direct air towards wet surfaces.
Dehumidifiers: Utilize these to extract excess moisture from the air.
Check HVAC Systems: Verify they’re operational to improve overall air circulation.
Long-Term Solutions to Prevent Future Water Damage
While immediate water extraction is crucial, implementing long-term solutions is essential for preventing future water damage. Start by investing in effective waterproofing techniques, such as applying sealants to your foundation and installing vapor barriers in crawl spaces. These methods help keep moisture out and protect your home.
Next, consider drainage solutions; verify gutters and downspouts direct water away from your foundation. Installing French drains or sump pumps can also mitigate flooding risks.
Regularly inspect your roof and plumbing for leaks or blockages, as these can lead to significant water intrusion over time. By taking these proactive measures, you’ll create a resilient environment that minimizes the chance of future damage, promoting a safer, healthier home for you and your family.
Understanding the Costs of Water Removal Services
Preventing future water damage is important, but understanding the costs associated with water removal services is equally essential. Various cost factors influence your expenses:
Damage Assessment: A thorough evaluation determines the extent of damage and necessary actions.
Service Options: Different services, like emergency response or equipment rental, can impact pricing.
Insurance Coverage: Knowing what your policy covers can alleviate some financial burdens.
Contractor Credentials: Reputable contractors often provide pricing transparency, ensuring you understand the costs involved.
Additionally, consider timeline expectations and service warranties, as these can affect overall satisfaction.
Frequently Asked Questions
How Can I Tell if My Home Has Hidden Water Damage?
Check for early signs of hidden leaks, like water stains, mold growth, or warped floors. Inspect behind appliances and under sinks regularly. Trust your instincts; unusual odors or dampness often indicate hidden water damage.
What Should I Do if My Insurance Doesn’T Cover Water Damage?
If your insurance doesn’t cover water damage, explore alternative insurance options or consider a personal loan. Like a lifeguard at the beach, you need to navigate through challenges to find safety and support.
How Long Does It Take for Water Damage to Cause Mold?
Mold growth can start within 24 to 48 hours if moisture sources, like standing water or high humidity, remain. Quick action to dry affected areas is essential to prevent extensive damage and health risks.
Can I Extract Water Without Electricity or Running Water?
Yes, you can extract water without electricity or running water. Use DIY solutions like buckets and siphons for water removal. Every drop you save is a step toward reclaiming your space and restoring comfort.
What Are the Health Risks Associated With Standing Water?
Standing water poses serious health hazards, including bacterial growth and mold development. It can lead to respiratory issues, waterborne diseases, structural damage, and pest infestation. You must address these risks promptly to protect your environment.
Review
In the face of water damage, acting swiftly is like steering a ship through a storm; every decision counts. By employing the right extraction methods and tools, you can minimize destruction and safeguard your home from mold. Remember, if the situation escalates beyond your control, don’t hesitate to call in the professionals. With effective strategies in place, you’ll not only recover but also fortify your home against future challenges, ensuring a safe harbor for years to come.
Recent Posts
Assessing Water Damage From Burst Pipes
Evaluating water damage from burst pipes requires thorough inspection, careful documentation, and swift action. You’ll
Mastering Emergency Sewage Cleanup and Water Removal
Sewage emergencies can be chaotic and overwhelming, yet they demand a structured response to prevent
10 Tips for Storm Water Damage Assessment
When storm water damage occurs, a systematic approach is essential. You need to identify the